
10 Factors to Consider Before Buying Tile Display Stands
10 Factors to Consider Before Buying Tile Display Stands
What Are Tile Display Stands — and Why They Matter More Than You Think
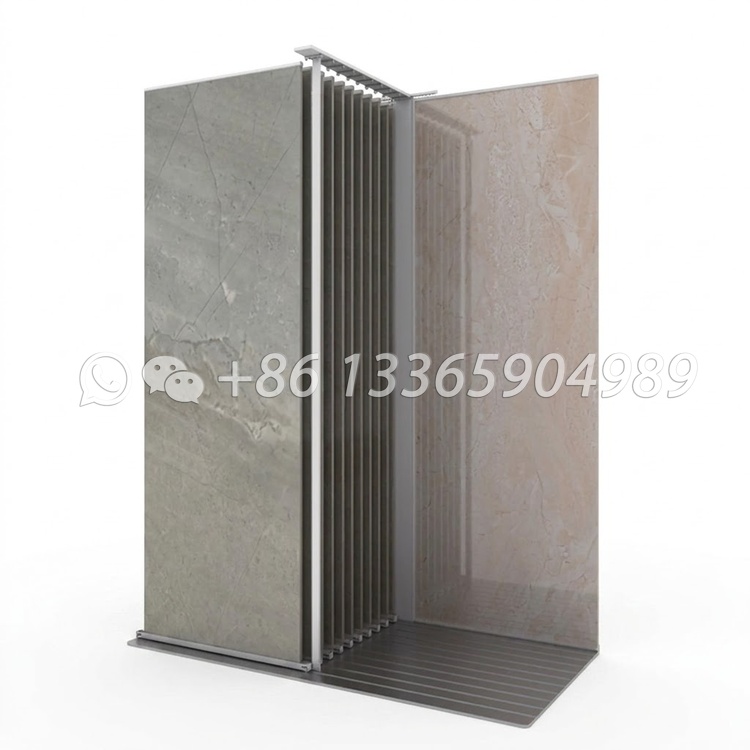
Tile display stands are specialized retail fixtures designed to present ceramic, porcelain, and natural stone tiles in a showroom or retail environment. Unlike generic shelving, they’re engineered for the combined challenges of heavy loads, frequent customer handling, and continuous visual presentation. They come in multiple formats — sliding-panel racks, A-frame displays, wall-mounted systems, rotating carousels — each suited to different showroom layouts and tile collections.
Here’s something most first-time buyers don’t realize until it’s too late: the display system you choose doesn’t just hold your product. It shapes how customers perceive your brand, how long they browse, which tiles they notice first, and whether they trust you enough to place an order.
Walk through any successful tile showroom — the kind where customers linger for 45 minutes and leave with a quote — and you’ll notice the displays recede into the background. The tile is the star. The rack just makes it look effortless. Now walk through a showroom where tiles are stacked on pallets or propped against walls, and you’ll feel the difference immediately. Customers rush through. They don’t touch the product. They don’t compare options. And they don’t buy as much.
I’ve spent 15 years manufacturing tile display stands for distributors, retailers, and showroom owners across more than 40 countries. In that time, I’ve watched buyers repeat the same four mistakes:
- They pick the cheapest rack without checking whether it can actually hold their tiles.
- They order standard dimensions that don’t fit their inventory.
- They ignore packaging costs — until the freight bill arrives and wipes out their margin.
- They treat the purchase as a one-time transaction instead of the start of a supplier relationship.
This guide covers the 10 factors that determine whether your tile display stand investment pays off — or becomes a problem you have to fix. Let’s get into it.
1. Can the Rack Handle the Weight? Load Capacity Comes First
Tiles are heavy. You know this. But somehow, load capacity is still the number one thing buyers overlook when comparing tile display racks.
Here’s what happens in practice. A catalog shows a sleek rack rated for “heavy-duty use.” It looks solid. The price is right. Six months later, shelves are sagging, the powder coating has cracked at every stress point, and tiles are scraping against each other every time a customer slides a panel.
The problem is almost always the same: the rack was designed for 300×600 mm wall tiles weighing 12–15 kg/m², but the buyer loaded it with 600×1200 mm porcelain floor tiles at 28 kg/m². Multiply that across eight tiers and you’re asking a structure to hold double what it was built for.
What to Actually Check
- Specific weight ratings, not labels. A serious tile display stand manufacturer will tell you exactly how many kilograms each shelf or tier supports. If the answer is “don’t worry, it’s strong” without a number, worry.
- Tile dimensions drive everything. A rack built for 300×600 mm tiles has a different frame geometry than one built for 900×1800 mm slabs. The width, depth, and shelf spacing all have to match your actual product range. Measure your largest tile first — that sets the minimum spec for everything else.
- Thickness matters. Standard ceramic tiles at 8–10 mm are one category. Porcelain pavers at 20 mm are another category entirely. The rack structure needs to be engineered for the specific product weight, not an average.
- Total system load. Don’t just check one shelf. Add up every shelf in the rack, loaded with your heaviest tile. That’s the number the frame and base need to support.
**Key Takeaway:** Send your tile specs — sizes, thicknesses, and SKU count per stand — with your very first inquiry. A qualified manufacturer will confirm load ratings against those numbers. One that dodges the question probably can’t back up their claims.
2. Showroom Space Isn’t Free — Is Your Layout Working?
Retail space costs money. Every square meter of your showroom needs to pay rent through product exposure, customer flow, and sales conversions. The tile display stand design you choose determines whether you’re using that space — or wasting it.
Think about sight lines. A customer walks through your front door and their eyes scan the room. Tiles displayed flat on the floor or stacked on pallets? Invisible. Completely invisible. Tiles displayed at a slight backward tilt (5–10 degrees) on a vertical stand? Those catch the eye. The customer walks toward them without even deciding to.

The Math of Showroom Efficiency
| Display Method | Tiles Visible at Once | Floor Space Used | SKUs per m² |
|---|---|---|---|
| Floor stacking / pallets | 1–2 (top tile only) | High | ~1 |
| Single-sided wall panels | 6–10 | Low | 4–6 |
| Double-sided sliding rack | 12–24 | Medium | 8–12 |
| Rotating carousel | 16–32 | Low | 12–20 |
A double-sided sliding tile display rack with 12 panels shows two dozen tile faces in the footprint of a single parking space. The same tiles laid flat would cover half the showroom floor and customers still wouldn’t see them properly.
Design Rules That Drive Results
- Compress the footprint, expand the display surface. Vertical, multi-tiered, double-sided — anything that shows more tile in less floor area.
- Respect the aisle. Main walkways need at least 1.2 meters of clearance. Freestanding displays in the center of the room need breathing room on all four sides. Wall-mounted displays shouldn’t protrude more than 400–500 mm or they’ll pinch your traffic flow.
- Modular beats welded. Your tile collection will change. A rack system you can reconfigure — add panels, remove tiers, reposition units — stays useful for years. A welded one-piece frame that worked for last season’s collection becomes dead weight when you introduce new formats.
**Key Takeaway:** Draw your floor plan before you order. Mark every stand position, calculate the SKU coverage, and compare it to your total product catalog. The gap tells you exactly how many more racks you need — or which products you can’t properly display.
3. What’s It Made Of? Material Quality Is the Lifespan Multiplier
Tile display stands don’t live in a gentle environment. They’re loaded and unloaded daily. Moved across concrete floors. Bumped by forklifts and hand trucks. Exposed to dust, moisture, cleaning chemicals, and in some showrooms, direct afternoon sun through floor-to-ceiling windows.
The material you choose is the single biggest factor in whether your racks still look professional in year three — or look ready for the scrap pile.
Material Options, Honestly Compared
Powder-coated steel is the workhorse of the industry for a reason. It’s strong, takes a beautiful finish, and when coated properly, resists rust for years. It’s heavier than aluminum, yes — but for a floor-standing tile display rack that isn’t supposed to move, weight is stability, not a drawback.
Stainless steel is the premium option. Near-indestructible corrosion resistance, no coating to chip, lifetime durability. The catch? It costs 2–3x more than powder-coated steel. Worth it for outdoor showrooms, coastal locations, or luxury boutiques where the rack itself needs to look expensive. Overkill for most indoor applications.
Aluminum has one genuine advantage: it’s light. If you need portable displays for trade shows or temporary pop-up showrooms, aluminum makes sense. But its load capacity is lower, it dents rather than bends, and it costs more than painted steel. For permanent showroom installations, steel wins on every practical metric.
Wood and MDF are the budget option. They look warm and can be customized locally. They also swell with humidity, scratch easily, can’t handle heavy tiles, and typically need replacement within 2–3 years. Useful for a temporary display on a tight timeline. Not a long-term solution.
What Separates Good Steel from Cheap Steel
Walk into any factory and you can spot the difference in five minutes:
- Steel thickness. Floor-standing racks holding heavy tiles need a main frame of at least 1.2–1.5 mm steel. Go thinner than 1.0 mm and you’re buying a disposable rack, not an investment.
- The coating process. Proper powder coating has four steps: degrease, phosphate (this is the step cheap factories skip), electrostatic powder application, and high-temperature cure. Skip the phosphate step and the coating looks fine for six months — then starts peeling at the edges.
- Salt-spray performance. If your showroom is anywhere near a coast, or if racks will sit in a humid warehouse before installation, ask about salt-spray test results. A quality powder-coated steel rack should survive at least 72 hours of neutral salt spray without rust at the scribe line.
**Key Takeaway:** Request a material specification sheet with your quotation: steel grade, thickness, coating type, coating thickness in microns. Factories that provide this documentation operate at a different quality tier than those that avoid the question.
4. How Do Customers Interact with Your Display?
The mechanism — how tiles are presented and accessed — shapes the entire customer experience. A customer who can smoothly slide out a panel, see the full tile face, compare it side-by-side with another, and slide it back without jamming is a customer who browses longer and buys more. A customer fighting a sticky, wobbly, or awkward rack leaves.
Display Types and When Each Makes Sense
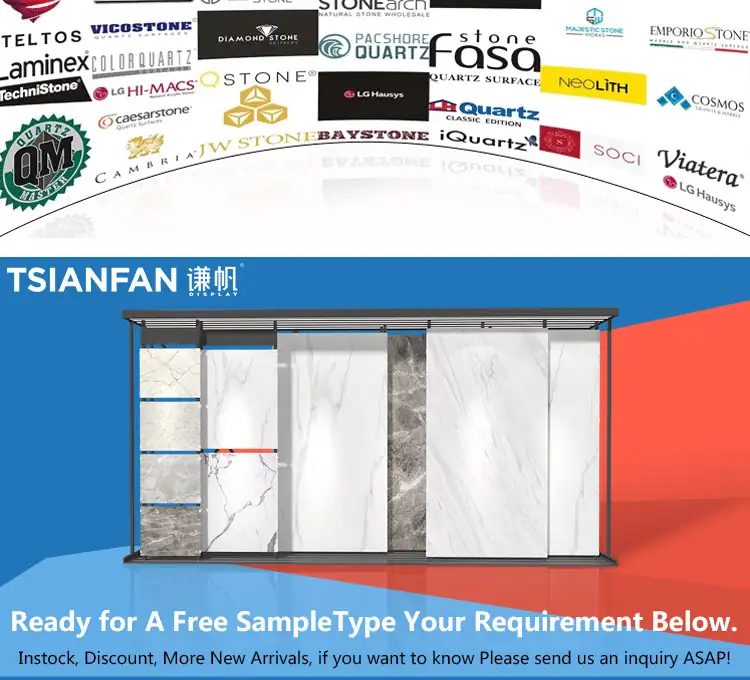
Sliding pull-out racks are the showroom standard for a reason. Tiles mount on individual panels that slide out like smooth drawers. Customers see the full tile face. They can pull two adjacent panels out and compare tiles side by side. Each panel operates independently. A 12-panel sliding rack shows 24 tile faces (double-sided panels) in about 1.5 square meters of floor space.
This is the format that drives the most sales in tile showrooms worldwide because it removes every barrier between the customer and the product: no lifting, no crouching, no digging through stacks. Just slide and see.
A-frame displays are the compact, portable option. Two angled panels in an A-shape, tiles displayed on both sides. They’re light, they’re cheap, and they work at trade shows or near showroom entrances as a featured-product spotlight. Not the right tool for displaying an entire collection — you’ll run out of surface area fast — but excellent for curating a “what’s new” or “bestseller” selection.
Wall-mounted displays are the space-efficiency champion. Panels fixed directly to showroom walls. Zero floor footprint. The trade-off is flexibility — once mounted, they’re permanent, and you lose the ability to create browsing “islands” in the center of the room. Best as part of a mixed layout: wall displays for your core collection, freestanding racks for featured and new products.
Rotating carousel displays pack density into a tiny footprint. Tiles mount on a vertical rotating frame; customers spin to browse. You can fit 16–32 tile faces in less than one square meter of floor space. The browsing experience is tactile and engaging. The limitation is tile size: carousels work best with formats up to about 450×900 mm. Large-format slabs don’t work on a rotating mechanism.
Sample board racks serve as a catalog reference system. Small sample boards (200×200 mm or 300×300 mm) organized in tidy tiers. Customers grab a sample, take it to a viewing table under good lighting, and the full-size tile lives on a nearby large-format display. This two-stage system — sample board discovery, then full-size confirmation — is how the most efficient showrooms handle collections with 200+ SKUs.
The Customer Experience Checklist
Before you buy any tile showroom display stand, walk through these four questions from your customer’s perspective:
- Can I see the full tile face without bending over or crouching?
- Can I compare this tile side-by-side with another one?
- Does the mechanism feel smooth and solid, or cheap and sticky?
- Can I pull a panel out and push it back without catching or jamming?
The goal is a display that disappears. The rack should be so smooth, so stable, and so unobtrusive that the customer forgets it’s there and focuses entirely on the tile. That’s when sales happen.
**Key Takeaway:** Match the display mechanism to the browsing behavior you want. Sliding racks for comparison shopping. A-frames for featured spotlights. Sample boards for high-SKU catalogs. A mixed system almost always outperforms a single format.
5. Off-the-Shelf Rarely Fits — Do You Need Customization?
Standard catalog racks are designed for the average buyer. Your tile collection isn’t average. Your showroom layout isn’t average. And your brand certainly shouldn’t look average. Customization closes the gap between a generic display and a system that works for your specific operation.
What You Can (and Should) Customize
Dimensions are the most important customization and the one buyers overlook most often. Rack height, width, depth, and shelf spacing should all be built around your actual tile sizes — not a catalog’s default. Build for your largest format first. A rack that holds 900×1800 mm slabs will also hold your 300×600 mm wall tiles. A rack built for 300×600 mm will not hold your 900×1800 collection.
Color costs almost nothing to customize in powder coating — any RAL color is available — but makes a significant difference in showroom cohesion. Most manufacturers default to silver-grey. That’s fine if it matches your space. If your brand uses navy blue or charcoal, your racks should too. A consistent color palette across your showroom communicates attention to detail.
Branding turns every display into a marketing asset. Your logo on the frame — printed, laser-engraved, or applied as a metal badge — means every rack silently reinforces your brand while the customer browses. It’s a one-time cost that pays off every day.
Structure includes how many tiers, whether panels are single- or double-sided, the base design (flat, wheeled, elevated), and how accessories attach. If you want LED strip lighting integrated into the frame to highlight tile surfaces, or built-in slots for price tags and QR code plates, those need to be designed in, not added as an afterthought.
Full OEM/ODM is the option for distributors and importers buying container volumes. You bring the design, the specifications, and the branding. The tile display stand manufacturer produces to your exact requirements, under your name, with your packaging. This is how the largest tile distributors build a consistent display network across hundreds of retail locations.
**Key Takeaway:** Send a drawing — even a rough sketch — with your initial inquiry. Include your tile sizes, desired panel count, and any special requirements. The quality and speed of the manufacturer’s response to that sketch tells you more about their capability than any catalog photo.
6. Safety Isn’t a Feature — It’s the Foundation
A fully loaded tile display stand can weigh 300–500 kg. If it tips, the result isn’t just damaged inventory. It’s a genuine safety hazard for customers and staff, and a liability exposure for your business. Safety has to be engineered into the rack from the first design sketch — it can’t be bolted on later.
The Safety Features That Actually Matter
An anti-tipping base is non-negotiable for freestanding racks. The base should be wider and heavier than the upper frame, bringing the center of gravity low. For wall-mounted displays, secure anchoring brackets — not drywall anchors — are the minimum. Some designs include floor-bolting points for permanent installations in high-traffic locations.
Frame rigidity is the test most buyers never think to do. Walk up to a loaded display. Push the top corner. It should not flex, sway, or wobble. A rigid frame distributes load evenly across every joint. Flex creates stress concentrations at weld points — and stress concentrations create failures.
Weld quality is invisible once the powder coating goes on, which is exactly why cheap manufacturers can hide bad welds behind a nice finish. A load-bearing tile display rack needs continuous welds — full beads — at every structural joint. Not spot welds. Not tack welds. Ask for photos of unpainted frames before coating. The weld quality is immediately obvious on raw steel, and a manufacturer who provides those photos without hesitation is telling you something about their confidence.
Panel retention and slide stops prevent two common accidents: tiles sliding forward when a panel is pulled out, and the entire panel being pulled completely out of the frame. Lip edges, retaining bars, and mechanical stops are simple features that prevent expensive accidents.
Edge finishing is the detail that separates professional from dangerous. Quality racks have deburred edges, rounded corners, and plastic end caps on exposed tube ends. Run your hand along a display edge. If it catches, it’s not finished properly.
**Key Takeaway:** Ask about safety testing. Some manufacturers provide load-test certificates or reference compliance with regional safety standards. “We’ve never had a problem” without documentation is a yellow flag. “Here’s our test report” is the answer you want.
7. Who’s Behind the Welding Mask? Supplier Experience Matters
The gap between a display stand that lasts a decade and one that develops issues in months almost always traces back to the factory floor. And factory quality comes from specialization — specifically, experience building tile display stands as a core product, not a side job for a general metal shop.
How to Spot a Specialized Tile Display Stand Manufacturer
Production lines purpose-built for tile racks. Specialized factories have custom jigs, welding fixtures, and workflows optimized for the specific geometry of display racks — the panel frames, the slide rails, the base assemblies. A general sheet-metal fabricator who occasionally builds racks uses generic tooling. Every joint is slightly different. Consistency suffers.
Welding at production scale. A single sliding display rack has 30–60 welded joints. At 500 units per month, that’s 15,000–30,000 welds. CO2 gas-shielded welding (MIG) and robotic welding cells produce consistent bead quality at that volume. Stick welding and manual processes don’t. Ask what welding method the factory uses and whether they have automated cells.
The complete surface treatment chain. The full sequence is: degreasing → phosphating → drying → electrostatic powder application → high-temperature curing oven. Each step depends on the previous one. Skip phosphating and the coating fails early. Undercure the powder and it chips. A specialized manufacturer has the full line in-house; a general fabricator often outsources coating to a third party.
Multi-stage QC checkpoints. Professional manufacturers inspect at incoming raw material, after welding (before coating), after coating (before assembly), and at final pre-packing. Each checkpoint catches defects that would otherwise reach your showroom. If a supplier can’t describe their QC process in detail, they probably don’t have one.
Factory ownership. Some “manufacturers” are trading companies that take your order, mark up the price, and subcontract production to whichever factory bids lowest. Ask directly: “Do you own your production facility?” and “Can we visit the factory?” A yes to both, without hesitation, is what transparency looks like.
Five Questions to Send with Your First Inquiry
- How many years have you been building tile display stands specifically?
- What’s your monthly production capacity for this product?
- Can you share recent photos of your production floor?
- What certifications does your factory hold?
- Can you connect us with clients in our region for reference?
**Key Takeaway:** The supplier who answers all five questions clearly, quickly, and with evidence is the one you want in your corner for the long term. The supplier who deflects or gives vague answers? That’s your signal to keep looking.
8. The Container Bill Will Surprise You — Plan Your Shipping
If you’re importing tile display stands, here’s a number to keep in mind: packaging, freight, and port handling typically add 30–50% to your unit cost. Sometimes more. The purchase price you negotiate with the supplier is only half the story.
Equally important: the packaging design determines whether your racks arrive showroom-ready or arrive bent, scratched, and needing hours of rework.

Packaging That Survives Ocean Freight
Knocked-down (KD) design is the cost multiplier. Racks that ship fully assembled waste container space. KD racks — disassembled, flat-packed, with assembly instructions — cut shipping volume by 50–70%. A good manufacturer designs for KD from the start, with bolt-together connections instead of welded frames that can’t be broken down.
Layered protection sequence. The bare minimum for ocean freight is: foam or bubble wrap on every powder-coated surface → corrugated cardboard corner protectors → heavy-duty 5-ply or 7-ply outer carton. Long components need extra reinforcement. If a supplier quotes “bubble wrap only” packaging, they’ve never shipped internationally — or they don’t care what arrives at your door.
Moisture is the invisible destroyer. Ocean containers are humid environments. Condensation forms inside cartons during temperature swings. Without desiccant packs in every carton and a moisture barrier on the outer packaging, surface rust can bloom on steel components during a 30-day voyage. This is especially critical for shipments traversing tropical routes.
Container loading is a skill. An experienced manufacturer knows exactly how many units fit on a pallet, how many pallets fit in a 20-foot or 40-foot container, and how to load so nothing shifts during transit. If a supplier can’t tell you container quantities within 5% accuracy, they haven’t shipped enough volume to know.
ISPM 15 pallets — fumigated, export-grade, stamped — are required for international shipping to most countries. Loose-loading cartons directly into a container without palletization guarantees damaged goods on arrival.
Calculating Your True Landed Cost
| Cost Layer | What It Includes |
|---|---|
| FOB unit price | Rack cost at the port of origin |
| Packaging | Should be included or clearly line-itemed |
| Ocean freight | Per-container rate to your destination port |
| Marine insurance | Typically 0.3–0.5% of cargo value |
| Destination port charges | Terminal handling, customs clearance, duties |
| Inland trucking | Port-to-warehouse delivery |
| **Total landed cost per unit** | Everything above ÷ number of racks |
**Key Takeaway:** Always compare suppliers on landed cost per display unit — never on FOB price alone. The cheapest FOB quotation frequently becomes the most expensive delivery once freight inefficiency, repackaging charges, and damage replacements are factored in.
9. Cheaper Now Usually Means More Expensive Later
The difference between a $120 rack and an $80 rack multiplied across 200 units is $8,000 — real money that hits your P&L immediately. It’s hard to ignore. But the purchase price is only the first of many costs a display rack generates over its lifetime.
What You’re Really Paying For
Replacement cost accumulates fast. An $80 rack that fails after two years costs you: $80 for the rack, plus freight, plus labor to assemble and install, plus the downtime of having a broken display on your showroom floor. Over five years, you might buy that rack twice. Or three times. Meanwhile, the $150 rack is still on its first installation, and it still looks good.
Showroom appearance is a revenue driver. A rack with peeling powder coating, rust spots at the welds, or sagging shelves makes your entire showroom look tired. Customers don’t consciously think “this rack is cheap.” They feel it. And the feeling transfers to your products. A showroom that looks well-maintained and professional builds trust. Trust converts to sales.
Customer experience is the silent multiplier. A sticky sliding panel or a wobbly shelf frustrates people. They spend less time browsing. They see fewer products. They’re less likely to find something they want to buy — and more likely to walk out and visit a competitor whose showroom feels better. The revenue you lose from a poor browsing experience dwarfs the money you saved on cheaper racks.
Safety liability has no ceiling. A rack that tips or drops tiles onto a customer is a legal, insurance, and reputational nightmare. No upfront savings can justify that exposure.
The Math That Changes the Decision
Stop thinking in cost per unit. Start thinking in cost per year of service life.
- A $150 rack that functions flawlessly for 10 years costs $15 per year.
- An $80 rack that needs replacement every 2 years costs $40 per year — nearly triple the cost over time, plus all the hidden costs above.
Apply the same framework to maintenance: Can you replace individual panels when one gets damaged? Are slide rails available as spare parts? Will the mechanism still run smoothly after 50,000 open-close cycles? A rack you can repair component-by-component is cheaper to maintain than one that’s junk when any single part fails.
Where to Spend and Where to Save
Spend on: frame material thickness, powder coating quality, slide mechanism durability, weld integrity. These determine lifespan.
Save on: choosing standard RAL colors over custom-matched shades, opting for modular bolt-together designs (cheaper to ship and easier to repair), placing a slightly larger initial order to reduce per-unit freight.
**Key Takeaway:** If your budget is tight, buy fewer high-quality racks and rotate your display periodically. A showroom with 8 excellent racks that show 40 tiles beautifully outperforms a showroom with 20 cheap racks that make every tile look second-rate.
10. After the Container Leaves — Supplier Support You Can Count On
Your relationship with a tile display stand manufacturer doesn’t end when the bill of lading is issued. Assembly questions, missing bolts, warranty claims, reorders — all of these require a supplier who’s still responsive and still cares six months after the payment cleared.
What a Real Partnership Looks Like
Assembly support that actually helps. KD racks need to ship with assembly instructions that work — clear diagrams, exploded views, step-by-step sequences. Not a single photocopied page with three blurry photos. Some manufacturers provide assembly videos or even on-site installation supervision for large projects. If you’re outfitting a 500 m² showroom with 60 racks, on-site support is worth asking for.
Spare parts that ship when you need them. Bolts get lost. Plastic end caps crack. Slide bearings wear out over years of daily use. A responsible manufacturer stocks spare parts and can ship them within 1–2 weeks, not “when the next production run happens in three months.” Ask upfront: what’s the spare parts policy, and what’s the typical ship time for a small parts order?
Communication speed during the order is the best predictor of communication speed after the order. How quickly does the supplier respond to your first inquiry? Two days or less is professional. A week is a warning sign. The supplier who takes a week to answer pre-sale questions will take longer when your container arrives with damaged cartons and you need resolution now.
Warranty means process, not just a promise. “We offer a 3-year warranty” is meaningless without the process behind it. Ask: “What exactly happens if I file a warranty claim? What documentation do I provide? What’s the typical resolution time? Do you ship replacement parts at your cost?” The answers reveal whether the warranty is real or a marketing line.
Red Flags Worth Walking Away From
- Response time exceeds 2 business days for initial inquiries
- Technical questions get vague, non-specific answers
- No dedicated English-speaking contact for international buyers
- Reluctance to provide factory photos, videos, or client references
- High-pressure sales tactics with artificial deadlines
The Sample Order Test
Before committing to a container-load order, place a small sample order of 2–5 racks. This is the highest-ROI step in the entire procurement process. For a few hundred dollars, you get to evaluate:
- Product quality — are the welds clean, the coating uniform, the slide mechanism smooth?
- Packaging — did everything arrive undamaged?
- Assembly — how long does it take, and are the instructions clear?
- Communication — how was the supplier to work with from inquiry to delivery?
If the sample order goes well, you’ve found a partner worth scaling with. If it doesn’t, you’ve saved yourself a container-load of problems at the cost of a few sample units.
**Key Takeaway:** The best manufacturers view every order as the beginning of a relationship, not a one-and-done transaction. They remember your specifications for reorders. They proactively suggest design improvements. They tell you about new options before you have to ask. That’s the kind of supplier that makes your business better — not just your showroom.
The Bottom Line
Choosing tile display stands isn’t really about buying racks. It’s about how your products are presented, how your customers experience your brand, and whether your showroom converts browsers into buyers.
Before you place an order, work through this article as a checklist against every supplier you’re evaluating. Ask the hard questions about load ratings, material specs, and shipping logistics. Request documentation — not promises. Place a sample order. The suppliers who welcome that level of scrutiny are the ones built for long-term partnerships. The ones who resist it are telling you something important.
If you’re sourcing tile display stands — for a flagship showroom, a distributor network, or a retail chain — we’d welcome the chance to understand your requirements. Fifteen years of specialized manufacturing. Installations in 40+ countries. A production line purpose-built for this product category. Contact us to discuss your project or request a quotation. We respond to all inquiries within one business day.

Frequently Asked Questions
What are the different types of tile display stands?
Tile display stands come in six main formats, each designed for a different showroom need:
- Sliding pull-out racks — the most popular showroom format. Tiles mount on individual panels that slide out for viewing. Best for comparison shopping and high-traffic showrooms.
- A-frame displays — portable, double-sided, compact. Ideal for trade shows, showroom entrances, and featured-product spotlights.
- Wall-mounted displays — fixed panels on showroom walls. Maximum space efficiency with zero floor footprint. Best paired with freestanding racks in a mixed layout.
- Rotating carousel displays — vertical rotating frames. High SKU density in minimal floor space. Best for formats up to 450×900 mm.
- Sample board racks — organized tiers of small sample boards (200×200 mm or 300×300 mm). Serves as a catalog reference system for showrooms with 100+ SKUs.
- Stacking/pallet displays — the simplest and lowest-cost format. Tiles stacked horizontally with dividers. Suitable for warehouse storage, not showroom presentation.
The right choice depends on your tile collection, floor plan, and customer browsing patterns. Most successful showrooms use a mix of 2–3 formats rather than a single type.
How much does a tile display rack cost?
Tile display rack pricing varies significantly based on material, size, capacity, and customization level:
- Basic sliding racks (powder-coated steel, 6–8 panels, standard dimensions): $80–150 per unit for bulk orders (50+ units).
- Heavy-duty large-format racks (thicker steel, 900×1800 mm capacity, reinforced frame): $180–300 per unit.
- Custom/OEM racks (branded, custom dimensions, integrated lighting/accessories): $200–500+ per unit depending on specifications.
- Stainless steel racks (corrosion-resistant, premium finish): 2–3x the price of equivalent powder-coated steel.
These are FOB (port of origin) price ranges. Your landed cost will be 30–50% higher after ocean freight, insurance, port charges, and inland delivery. For accurate pricing, provide your tile dimensions, desired panel count, and order quantity to the manufacturer.
How should I display large format tiles in my showroom?
Large format tiles (600×1200 mm and larger, especially 900×1800 mm and 1200×2400 mm slabs) require display stands engineered specifically for their size and weight:
- Use dedicated large-format sliding racks — the frame must be wider, deeper, and built with thicker steel (1.5 mm minimum) than standard racks. Each panel accommodates one full-size tile.
- Ensure adequate viewing distance — customers need to step back 2–3 meters to appreciate large-format tile patterns. Don’t crowd these displays into narrow aisles.
- Display at a slight angle (5–8 degrees) — this catches overhead lighting and reduces glare, making surface texture and color variation visible.
- Use sample boards for browsing, full slabs for confirmation — a sample board rack lets customers discover large-format options without walking the entire showroom. The full slab display confirms their choice.
- Consider feature walls — one or two large slabs mounted on a dedicated wall display near the showroom entrance create a powerful first impression and draw customers deeper into the space.
Can I order tile display racks with my company logo?
Yes. Most professional tile display stand manufacturers offer branding options ranging from simple to fully custom:
- Logo printing — UV-printed or screen-printed directly onto the rack frame. Cost-effective for bulk orders.
- Laser engraving — permanent, premium-look branding etched into the metal surface. Cannot fade or peel.
- Metal badge/plaque — a separate branded plate attached to the frame. Easy to update if your branding changes.
- Full OEM service — your branding on the rack, the packaging, and the assembly instructions. The product ships under your company name as if you manufactured it.
Minimum order quantities for branded racks are typically 50–100 units for full OEM and 20–30 units for logo printing on existing designs. Discuss your branding requirements during the quotation stage so the manufacturer accounts for it in the design and pricing.
What is the best material for tile display stands?
For most indoor tile showrooms, powder-coated steel is the best balance of strength, durability, appearance, and cost:
- It handles heavy tile loads without flexing or sagging.
- A quality electrostatic powder coating (60–80 microns, properly cured) resists scratches and rust for 5–10 years in indoor use.
- It’s available in any RAL color to match your showroom’s design.
- It costs significantly less than stainless steel while delivering comparable structural performance.
Choose stainless steel if your display will be outdoors, in a coastal/high-humidity environment, or in a luxury showroom where the rack itself needs a premium appearance.
Choose aluminum only for portable displays that need to be moved frequently — trade show racks, pop-up showroom fixtures — where weight matters more than maximum load capacity.
Avoid wood and MDF for permanent showroom installations. They degrade quickly under daily use and can’t reliably support heavy tiles long-term.
How long does shipping take for tile display racks from China?
Typical timelines from order confirmation to delivery at your warehouse:
| Stage | Duration |
|---|---|
| Production (custom order, 100–200 units) | 25–35 days |
| Ocean freight to Europe or North America | 15–30 days |
| Ocean freight to Middle East or Southeast Asia | 10–20 days |
| Ocean freight to Africa or South America | 20–40 days |
| Destination port clearance + inland trucking | 5–10 days |
| **Total: order to warehouse** | **6–10 weeks** |
Expedited production (15–20 days) and air freight (3–7 days) are available at a significant premium — typically 3–5x ocean freight cost. Plan for the standard timeline unless you have a hard deadline; the savings are substantial.
What’s the difference between FOB and CIF pricing?
These are Incoterms that define who pays for what in international shipping:
- FOB (Free On Board): The supplier covers all costs to get the goods loaded onto the vessel at the port of origin. You pay ocean freight, insurance, and all destination charges. You control the shipping — you choose the forwarder and negotiate rates.
- CIF (Cost, Insurance, Freight): The supplier arranges and pays for ocean freight and minimum insurance to your destination port. You pay destination port charges and inland delivery. Convenient but you lose control over the shipping process and may pay a markup on freight.
For first-time importers or smaller orders, CIF is simpler. For experienced buyers or large orders, FOB gives you cost control and the ability to use your preferred freight forwarder. Always confirm which Incoterm applies to your quotation.