Importer Checklist: Factory Visits for Stone Display Rack QC and
Editorial Trust Note: This article is built from public market sources and reviewed by our factory product team before publication.
Author: Tsianfan Insights (Display & Packaging Sourcing Specialist)
Reviewed by: Tsianfan Engineering Review (Product Quality & Standards Verification)
Last updated: 2026-06-24 | About | Editorial Policy | Business Disclaimer | Contact
Most importers spend their factory visits shaking hands in conference rooms and photographing finished goods in the showroom. That is a mistake. The real story of a stone display rack — whether it will hold a 120kg marble slab for five years without wobbling — is told 30 meters away on the welding floor. I have walked enough factory floors to know that the gap between a display system that performs for a decade and one that starts loosening in six months is almost always traceable to three things: weld quality, powder coat adhesion, and whether anyone actually load-tested the frame before it left the facility.
This article is a practical walkthrough of what to inspect when you visit a display rack factory. It is written for importers, wholesalers, and showroom buyers who source tile display stand systems and display solutions for stone and engineered surfaces. The focus is on countertop display stands and slab presentation racks — the heavy-lift workhorses of any stone showroom.
Start at the Welding Line, Not the Showroom
Welding is where a display rack earns its load rating. A countertop display rack like the SRT037 carries slabs weighing anywhere from 40kg to over 100kg per slot. The frame must transfer that weight to the floor without twisting, buckling, or developing stress fractures at the joints. This is why CNC-welded joints matter. A properly executed CNC weld penetrates both members evenly, creating a joint that is actually stronger than the surrounding steel. A rushed hand-weld with inconsistent bead width is a future failure point — and stone slabs are unforgiving when a joint gives way.
When you stand at the welding station, watch for three things. In practice, check whether the jigs are CNC-machined or improvised from scrap stock. Precision jigs produce identical frames batch after batch; improvised setups produce variance. Another practical angle, look at the weld beads themselves. Consistent bead width across a joint indicates steady travel speed and correct amperage. Splatter, undercut edges, or erratic bead patterns suggest the welder was rushing or the settings were off. Third, ask how many units per shift each welding station produces. A station turning out more than 40 complex frames per eight-hour shift is likely sacrificing quality for speed.
The SRT037 frame, for example, uses full-frame gusset plates at all four corners specifically to handle lateral loads — the kind that occur when a customer leans a heavy quartz slab forward to inspect the polished face. Without those gusset plates, the frame twists. With them, the load distributes across the entire structure. This is the level of engineering you are looking for, and it starts at the welding jig.
Recommended Product Highlights
The following products are frequently selected in similar sourcing scenarios.

Material Compatibility: Not Every Rack Works for Every Stone
A common sourcing error is treating all stone display racks as interchangeable. They are not. Marble, granite, quartz, porcelain, and terrazzo each have distinct weight profiles, surface sensitivities, and display requirements. Matching the rack to the material is not a technical nicety — it is the difference between a showroom that converts browsers into buyers and one where slabs chip, racks wobble, and expensive stone sits unsold.
| Material | Typical Slab Weight (per m² at 20mm thickness) | Recommended Rack Type | Key Spec to Verify |
|---|---|---|---|
| Marble | 52-56 kg | Staggered front-to-back slot display with tilt-back angle | EPDM contact pads at all touch points; 7° minimum tilt-back |
| Granite | 54-60 kg | Heavy-duty A-frame or waterfall-style tower | Load rating of 75kg+ per shelf; reinforced lower tiers |
| Quartz / Engineered Stone | 50-58 kg | Push-pull rail mechanism or pull-out panel system | Slider carriage pre-assembly; dampened stops |
| Porcelain (large format 1200×1200mm+) | 30-38 kg | Flat-pack modular rack with adjustable slot brackets | Tool-free slot adjustment; M8 stainless steel fasteners |
| Terrazzo | 48-54 kg | Modular bolt-together frame with cold-rolled steel uprights | 2.5mm minimum wall thickness on square tube uprights |
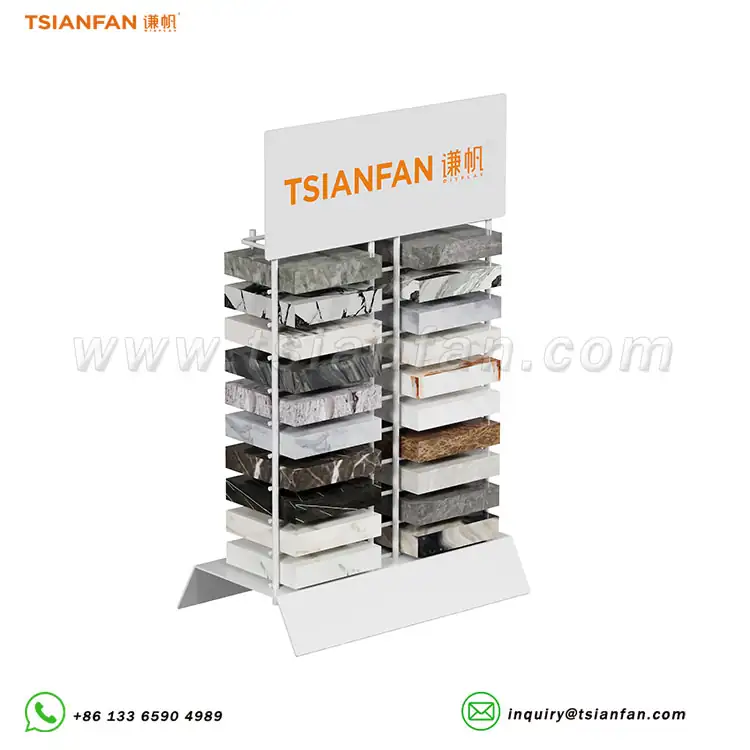
The calacatta white quartz stone sample countertop display stand (model 878) illustrates this material-specific engineering in practice. It uses a 7° tilt-back angle that keeps slabs stable without clamping — meaning customers can browse freely while slabs stay put. The slot depth adjusts from 10mm to 30mm without adapter plates, accommodating everything from thin porcelain to thick marble. That adjustability is not a gimmick; it is the result of designing around the reality that stone distributors rarely carry just one material.
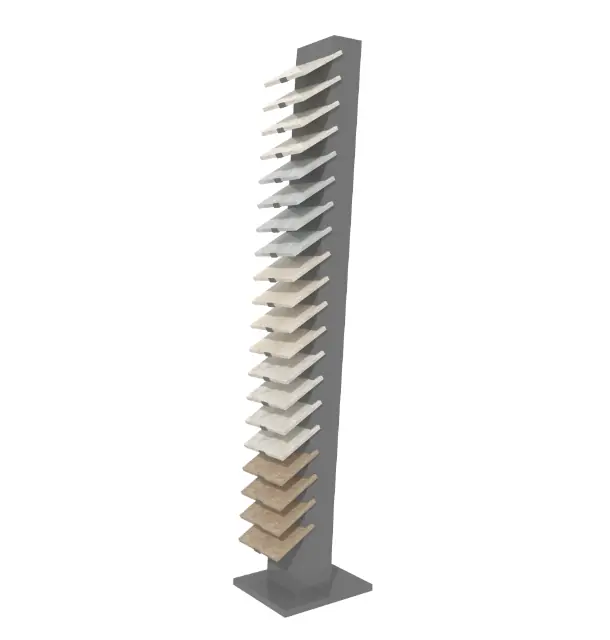
For showrooms displaying mixed collections, a waterfall-style tile display stand like the SRT013 offers a different approach. Its push-pull rail mechanism, rated at 50kg per rail, lets a single staff member reorganize an entire display wall in minutes. When your tile collection changes seasonally — and it will — that tool-free adjustability becomes a daily operational advantage rather than a spec sheet bullet point.
Powder Coating: The Finish That Protects Your Investment
A display rack’s powder coat does more than look good in matte black. It is the primary defense against corrosion, scratch damage, and the kind of slow degradation that turns a premium showroom fixture into an eyesore. In facilities near coastal areas — common for stone importers in Dubai, Miami, Singapore, or Sydney — salt air attacks exposed steel relentlessly. A thin or poorly adhered powder coat fails within two years in these environments.
During a factory visit, ask to see the powder coating line — specifically the pretreatment stage. Proper pretreatment involves acid pickling followed by a phosphate or zirconium conversion coating. This creates a surface profile that the powder grips mechanically. Skipping this step produces a finish that looks fine on delivery day but starts peeling within 12 months. The SRT037 countertop display rack was In practice prototyped for a Dubai-based importer specifically because standard powder coating could not survive 45°C warehouse heat without peeling. That prototype is reportedly still in service years later — a testament to getting the coating spec right.
The practical QC check: bring a coin to the factory visit. Ask to see a finished frame section and press the coin edge firmly against the powder coat. A properly cured coating at 90-110μm thickness (the spec used on Tsianfan’s heavy-duty racks) will not chip or crack under moderate pressure. A coating below 60μm will. This is not a laboratory test, but it separates serious finishing from cosmetic-only application in about ten seconds.
Also verify the curing temperature. Powder coating requires a 600°C bake to achieve full cross-linking — the same specification used for outdoor architectural hardware. Lower-temperature curing saves energy but produces a softer finish that scratches more easily and fades faster under showroom lighting.
Load Testing: Numbers That Actually Mean Something
Every display rack manufacturer publishes load ratings. Few publish their safety factors. The difference matters enormously. A rack rated at 75kg with a safety factor of 1.2 is fundamentally different from one rated at 75kg with a safety factor of 2.5. The In practice can handle 90kg before permanent deformation; the Another practical angle can handle 187.5kg before the same point. When presenting a $3,000 marble slab to an architect, that gap is not academic.
The 878 display stand is load-tested to 120kg per slot with a published safety factor of 2.5. This means it has been physically loaded with 300kg per slot during testing and showed no permanent deformation. During a factory visit, ask to see the load-testing apparatus. Most factories use hydraulic jacks with calibrated load cells. Ask for the most recent test certificate for the rack model you are buying — not a brochure, not a catalog number, but an actual dated test record. Factories that test regularly keep these records readily accessible. Factories that do not will deflect the question.
Another revealing question: ask where the center of gravity sits on a loaded rack. The Terrazzo sample showroom display rack (model 501) was engineered with its center of gravity 40% below the frame midpoint — a deliberate choice made after studying how customers interact with stone displays. They lean slabs forward. The rack must not move. This kind of engineered stability does not happen by accident; it happens because someone modeled the load path before cutting steel.
Inquiry: Define target materials and showroom markets — specify whether you are displaying marble, granite, quartz, porcelain, or mixed collections.
Sampling: Request a sample frame section or completed rack for physical inspection. Confirm rack type, slot configuration, and any customization requirements including RAL color matching.
Bulk Order: Lock specifications including frame dimensions, load ratings, powder coat thickness, and packaging format. Agree on QC gateways, lead time, and pre-shipment inspection protocol.
The Flat-Pack Advantage: Freight Costs and Showroom Assembly
Shipping assembled display racks is expensive for no good reason. A welded display fixture that ships fully built occupies roughly eight times the container volume of an equivalent flat-pack design. The floor tile displays countertop display rack (SRT797) packs flat to approximately 12% of its assembled volume. For an importer ordering 50 units, that difference can mean fitting the entire order into a single 20-foot container versus needing a 40-footer — a savings that runs into thousands of dollars on ocean freight alone.
Flat-pack design also simplifies receiving. Assembled racks require warehouse space for staging, uncrating, and positioning. Flat-pack units store compactly until installation day. The trade-off is assembly labor, which is why pre-drilled and tapped threaded inserts matter so much. On Tsianfan racks, every threaded insert is drilled and tapped before finishing — the powder coat never fills the threads. Assembly bolts go in clean every time. This is a small detail in the factory but a significant frustration reducer on the showroom floor.
All fasteners are M8 stainless steel, a standard size available at any hardware store worldwide. This is an intentional choice: if a bolt gets lost during assembly or a showroom reconfiguration five years later, replacement does not require a special-order part from the original factory. EPDM rubber contact pads at all sample touch points are rated for permanent indoor use and resist UV degradation — important for showrooms with natural light exposure.
Sample Boxes and Packaging Accessories: The Supporting Cast
Display racks are the primary investment, but sample box and sample case systems deserve attention during factory visits as well. These are the portable sales tools that leave your showroom and travel to architects’ offices, construction sites, and client homes. A stone display rack in the showroom converts foot traffic; a wel
I have watched procurement teams change direction after touching the actual finish in person. A practical display setup makes differences in texture and edge quality obvious without lengthy explanation.
l-designed sample box converts off-site meetings. Both need to represent your stone collection accurately and survive handling that is significantly rougher than anything a fixed display endures.
When evaluating sample cases, check the hinge mechanism In practice. Continuous piano hinges outlast spot-welded butt hinges by a factor of three or more in daily-use scenarios. Check the case corners — reinforced metal corners prevent the crushing damage that happens when sample cases get stacked in vehicle trunks or shipping containers. Check the interior lining: felt and velvet are standard, but EPDM or neoprene linings resist staining from stone dust and can be cleaned with a damp cloth between client visits.
Custom branding on sample cases — logo embossing, color-matched exteriors, branded interior printing — is widely available from factory-direct manufacturers. The key specification to confirm is whether the branding is applied before or after the exterior coating. Branding embedded into the coating process (such as screen-printed logos under a clear protective topcoat) lasts significantly longer than stickers or decals applied post-production.
Factory QC Gateways: What to Document on Your Visit
A structured factory visit captures QC evidence at specific production stages. Here is the checklist I recommend bringing to any display rack factory visit, organized by production zone:
Incoming Steel Inspection: Ask to see mill test certificates for the current batch of structural steel. These certificates confirm the grade, yield strength, and chemical composition of the steel entering production. ISO-certified mills provide full traceability from melt to delivery. If the factory cannot produce mill certs on request, the steel in your display racks could be anything — including recycled stock with inconsistent mechanical properties.
Welding Station: Document weld bead consistency across at least five frames from the same batch. Photograph the welding jigs. Note whether joints are CNC-welded (preferred for load-bearing frames) or manually welded. Check for gusset plate installation at corner joints on heavy-duty models. A missing gusset plate on a slab rack is a red flag — it means the frame relies entirely on weld strength for lateral stability.
Powder Coating Line: Verify pretreatment bath sequence. Document coating thickness using a handheld gauge — ask the factory to demonstrate on a finished frame. Acceptable range is 80-120μm for indoor display racks; outdoor-rated applications should be at the upper end. Confirm curing oven temperature and dwell time.
Assembly and Fitment Test: Request a test assembly of one complete rack unit from the batch being produced for your order. Check that all bolt holes align without force, that slot brackets seat fully, and that moving parts (sliders, hinges, adjustable brackets) operate smoothly through their full range of motion.
Load Test Area: Ask to witness a load test on a rack from your production batch. Even a partial test — loading one shelf to rated capacity — provides more confidence than any certificate. Watch for frame deflection, joint movement, and contact pad compression. The rack should remain stable with no visible deformation.
Packaging and Labeling: Inspect how finished racks are packed for export. Flat-pack designs should have individual components separated by protective dividers. Hardware kits should be sealed and labeled. Export cartons should carry handling marks in English and the destination language. Confirm that assembly instructions (preferably pictorial) are included in each package.
Showroom Conversion: Why Display Engineering Matters to Your Bottom Line
Stone showrooms face a constant tension: display more products to sell more, but do not overcrowd the space. A well-engineered display rack resolves this tension by maximizing sample density while maintaining clear sightlines and easy customer access. The staggered front-to-back layout used on models like the 878 and SRT037 lets a showroom present every slab face from a single aisle — no walking around, no blocked views, no staff time wasted retrieving samples from storage.
Floor space in a retail showroom typically runs $20-50 per square foot. A display rack that holds 18 full-size samples in roughly 4 square feet — less than a standard pallet — directly impacts revenue per square foot. This is the metric that matters to showroom operators. It is also why sourcing decisions should prioritize display density and customer flow over upfront rack cost. A cheaper rack that displays fewer samples or creates showroom bottlenecks costs more over its service life than a well-engineered system that maximizes conversion.
Tile retailers consistently report that customers make faster decisions when they can compare 6-8 slabs side by side. Display systems that enable that comparison shopping experience — waterfall tile display towers, pull-out panel racks, and multi-slot countertop stands — pay for themselves through accelerated sales cycles and higher average transaction values. This is not marketing language; it is showroom economics observed across dozens of markets and material categories.
Custom engineering support adds another layer of value for importers and distributors. Providing a showroom floor plan to the manufacturer and receiving an optimized layout proposal — rack placement, customer flow paths, lighting integration suggestions — turns a commodity rack purchase into a strategic showroom investment. Factories with in-house engineering teams typically deliver these layout proposals within a few business days of receiving requirements. Tsianfan includes this service at no charge for order inquiries, reflecting a manufacturing philosophy that treats display systems as showroom infrastructure rather than simple fixtures.
The modularity of modern display systems also deserves attention during sourcing. Many racks allow infinite row extension by bolting additional units together — a critical feature for growing distributors who need to expand display capacity without replacing existing infrastructure. Removable end caps, standardized bolt patterns, and consistent upright dimensions across model ranges enable this expandability. Before committing to a rack system, confirm that the model you are buying integrates with the manufacturer’s broader product line. A display system you can grow into over five years is fundamentally better value than one you outgrow in two.
Putting It All Together: From Factory Visit to Showroom Floor
The path from sourcing decision to installed showroom display involves multiple handoffs — factory production, export packaging, ocean freight, customs clearance, local delivery, and final assembly. Each handoff introduces risk. The factory visit is your single best opportunity to de-risk the entire chain by verifying that what leaves the factory matches what you specified.
Document everything. Photograph the welding jigs, the coating line, the load test apparatus, and the packaging area. Note the names of the production supervisors you speak with. Request batch-specific documentation including mill certs, coating thickness logs, and load test records. These documents serve two purposes: they provide traceability if quality issues arise later, and they signal to the factory that you are a buyer who inspects rather than a buyer who trusts. This distinction matters in factory-direct sourcing relationships.
The display rack you install in your showroom today will present stone slabs to architects, designers, and homeowners for years. It needs to look professional on day one and day one thousand. It needs to hold heavy, expensive, irreplaceable material without sagging, wobbling, or corroding. It needs to make your stone collection accessible, comparable, and desirable. Getting that outcome starts not with a purchase order but with a factory visit that prioritizes welding lines over welcome brochures. Walk the floor. Inspect the jigs. Test the coating. Document the load test. Your showroom — and your customers — will feel the difference.
For detailed specifications on countertop display stands, slab racks, tile display towers, and sample case solutions, Contact us to discuss your requirements. Our engineering team provides layout proposals and custom specifications based on your showroom dimensions, material types, and branding needs.
Evidence & Sources
This article references the following industry sources and market materials:
- floor tile displays countertop display rack for stone-SRT797 (WP Product / Countertop Display Stands | 2026-05-16T05:31:54)
- Countertop quartz stone display rack for sale waterfall tiles show tower-SRT013 (WP Product / Countertop Display Stands | 2026-05-16T16:27:03)
- calacatta white quartz stone sample countertop display stand showroom display rack (WP Product / Countertop Display Stands | 2026-05-16T16:40:48)
- artificial stone countertop display rack-SRT037 (WP Product / Countertop Display Stands | 2026-05-16T11:55:34)
- Terrazzo sample showroom display quartz stone tiles display rack (WP Product / Countertop Display Stands | 2026-05-16T16:45:43)
This content is for informational purposes only and does not constitute legal, financial, or procurement advice.